Displaying of Selected Columns and Their Ordering in Product List in Administration
In Phoca Cart options, in parameter Columns - Product List (Administration) you can select which columns will be displayed in product list in administration. Some of the selected columns can be editable in place.
For example:
- title - title column will be displayed
- title=E - title column will be displayed and this column can be edited in place
 Selected columns in product list - options
After saving options, only selected columns will be displayed in product list.
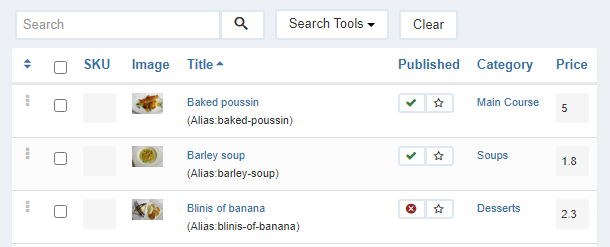 Selected columns in product list
Edit in Place in Administration
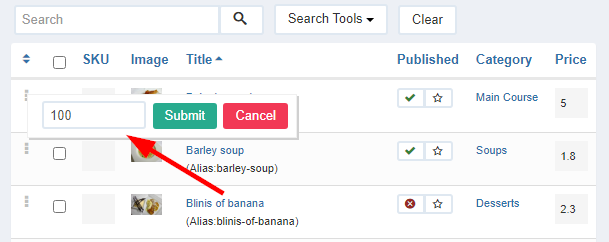
There are some columns (mostly text or textarea types) which can be directly edited in administration list of items (edit in place). There is no need to open each item and edit it step by step, the selected column can be edited directly in list. This can save a lot of time when you need to edit a lot of items at once. For example, changing the price for selected items.
Just click on gray box field and edit form will be displayed. Set the value and click Submit button or hit ENTER key (SHIFT + ENTER for textarea fields like e.g. description).
 Copy attributes
There is a special parameter in options called Title - Edit in Place. With help of this parameter you can set the behavior of title and alias when editing in place. There are following options for this parameter:
- Alias cannot be edited and cannot be overwritten by title
- Alias cannot be edited but it can be overwritten by title
- Alias can be edited but cannot be overwritten by title
- Alias can be edited and can be overwritten by title
When editing and saving the title, you can set if the alias will be newly created from newly saved title or not. You can even set if the alias can be edited in place like the title. If you set "Alias can be edited and can be overwritten by title" then when saving title, even alias will be changed but you still have the option to edit this alias manually with edit in place function.
Copying Attributes of Products
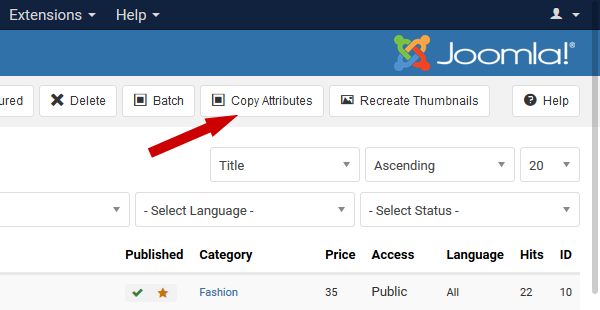
If one of your product includes attributes, you can copy such attributes from this product to another product(s).
Go to Administration - Components - Phoca Cart - Products. Select products to which you want to copy the attributes and click on Copy Attributes button.
 Copy attributes
In opened window, select product from which the attributes should be copied and click on Process button.
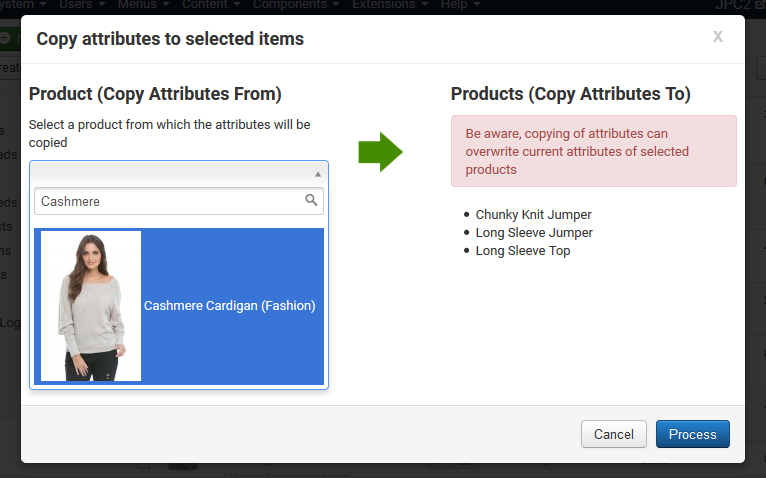 Copy attributes to selected items
Setting the Required Attributes and Default Options
Sometimes it happens that the default product without attributes does not actually exist, so it is necessary to set both the attributes and their options correctly.
Example: T-Shirts. We sell t-shirts which have some size (M, L, XL) and some color (Willow, Navy, Leaf). The default basic product does not include any size and any color so in fact it does not exist. There is no t-shirt without size or color. Therefore, we must set up the product so that it is not possible to order a basic product without attributes.
First of all, we need to set right type of attribute. In our case, it is: Select, Color (Select) or Image (Select). We need to set our attribute to be required. And we need to select one option of this attribute which will be default.
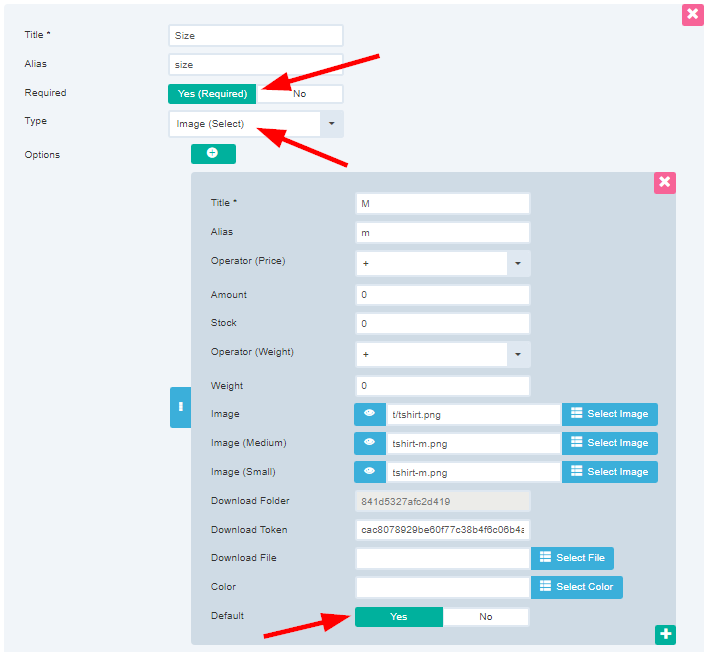 Attributes - required, default option
Now users are not able to deselect required attributes when adding products to cart. This means that only products with selected attributes can be ordered.
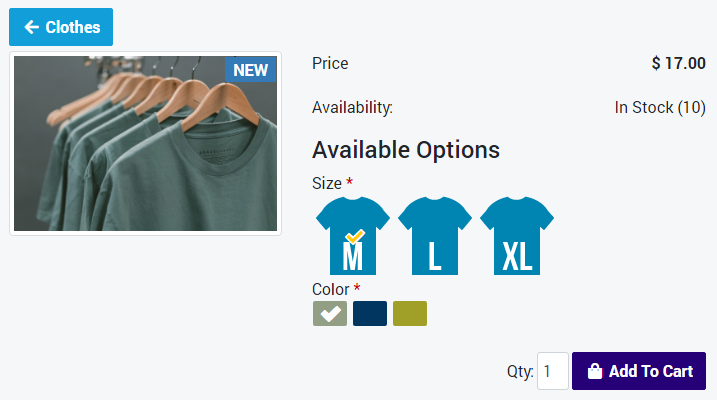 Attributes - select required attributes
This applies to all select attributes but also to checkbox attributes. If a checkbox attribute is required, it cannot be unchecked when there is only one left.
Form fields - predefined values
When setting up custom user form fields, a simple selection list can be created.
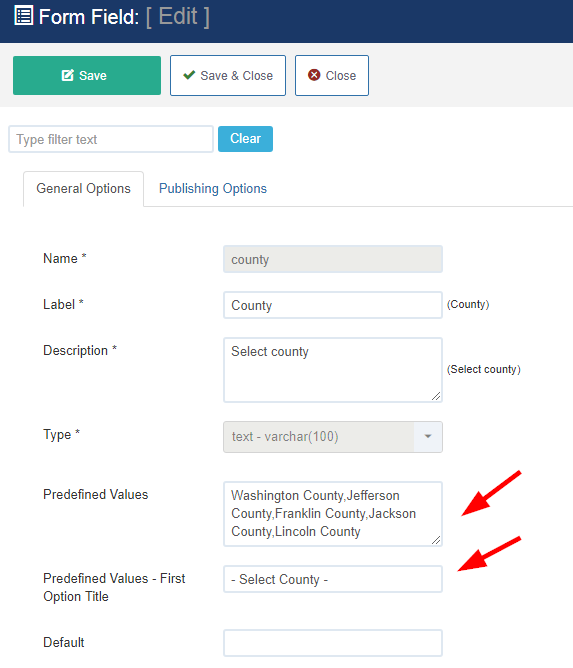 Form fields - predefined values
In Predefined Values parameter it is possible to define simple list (valuses separated by comma) and in Predefined Values - First Option Title parameter, first value of select box can be defined.
In frontend, this list will be displayed and user can select the value. Such value will be stored.
 Form fields - predefined values - frontend
Limits:
- There is no connection to other form fields (like there is for country and region - dynamically generated regions based on country)
- The selected and stored values are not more tied to the predefined values list (values are just stored as static values, so they don't change if this list will be changed) - It is not stored reference to this value but value itself (based on type)
- All values set in predefined values form field must match the type selected in Type form field.
- The list cannot be used as a rule in payment or shipping methods, etc.
Setting custom rules for form fields
In Phoca Cart you can create custom form fields. Such fields can be used when user enters data about himself. For example when filling in billing or delivery address in the checkout form. Form fields can include default Joomla! validate rules but it is even possible to write own rules.
Example: We need the user to fill in a text field that is a maximum of ten characters and consists only of alphanumeric characters.
There are two types of validation rules:
- browser validation
- server validation
Browser validation is used to prevent the user from sending an incorrectly filled out form unnecessarily. Server validation is there from a security point of view and ensures that values that do not belong to database are not stored there. Browser validation is here for user convenience, server validation protects our database. It is very important that server validation rules are complete and correct.
Browser validation rules
Browser validation rules can be set in Form fields in administration. In our example we use two options:
- Patterns: [a-zA-Z0-9]+
- Maxlength Attribute: 10
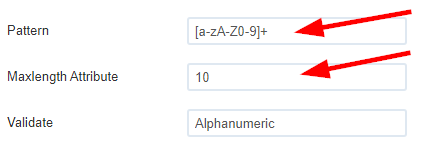 Form fields - browser validation rules
Such rules are set in HTML input form fields and are tested directly in browser. User is not able to enter text that is longer than 10 characters and does not consist of only alphanumeric characters.
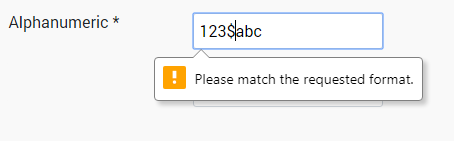 Form fields - browser validation rule
Server validation rules
Server validation rules cannot be set so easily. Specific rules need to be written in PHP language and such file needs to be stored in following folder:
- components/com_phocacart/models/rules/
See Alphanumeric.php file as example of server validation rule. Be aware this server validation rule file includes only validation of alphanumeric characters not the length of the string. The rule for the string length test can be found in the comment of this file. When the file is complete and ready, the name of form field rule (file name) should be set in Form fields in administration. The following option should be set:
- Validate: Alphanumeric
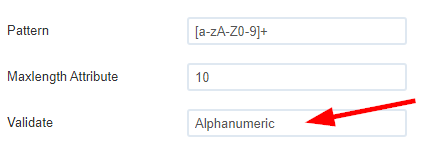 Form fields - server validation rule
As written earlier, server validation rule must be properly tested and should be written by experts only.
Replace decimal comma with a point
Prices in Phoca Cart database are saved with the point (decimal point). However, in some countries a decimal comma is used instead of a decimal point. Therefore, the following parameter is to be turned on in this case:
- Replace decimal comma with a point
In this case, if user enters a price with a decimal comma, it is automatically changed to a decimal point. This allows users not to leave their way of using keyboard.
Hide header
If you need to hide the header on Phoca Cart page, the first place to set it is the menu link to Phoca Cart.
Go to Joomla! administration - Menus - e.g. Main Menu - click on menu link to Phoca Cart - go to tab Page Display and set parameter Show Page Heading to No.
If you want to specify the header hiding for each view, this is possible using the parameter Hide Header - View in Phoca Cart options.
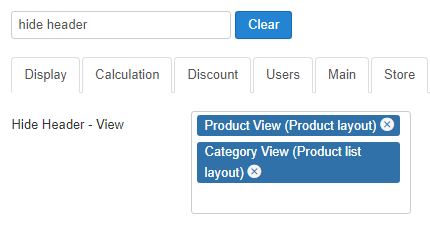 Hide Header parameter
You can also create different combinations. For example, the Show Page Heading parameter is set to No in the menu item. Then nothing is displayed in the Categories view, but only the category name is displayed in the Category view (no menu link title). If there is no header in Categories view, you can then even insert it manually using the description.
So you can define if the header in Category view will include menu link title including category name or only a category name or nothing.
Hiding tax in fronted
The tax calculation can be switched off in the parameters. Sometimes it is necessary to have the tax calculation on but not to display the tax in the product price. In this case, the easiest way to not show tax is to hide tax items using CSS. For example in items view.
.com_phocacart.view-item .ph-price-netto-txt,
.com_phocacart.view-item .ph-price-netto,
.com_phocacart.view-item .ph-tax-txt,
.com_phocacart.view-item .ph-tax {
    display: none;
}
This code will only show the gross price (brutto) and hide the tax and net price (netto).
Test PayPal payment method with PayPal sandbox account
To create PayPal sandbox account and test it in Phoca Cart:
- Enable System Log in Phoca Cart options
- Visit following link PayPal sandbox testing guide 🔗
- Login with your PayPal account (Personal and Business account types will be automatically created)
- Copy email address from your Business account and paste it to Merchant Email parameter in payment method options (Administration - Phoca Cart - Payment - edit PayPal payment method - Payment Method Options tab - Merchant Email parameter - save the options)
- Copy email address from your Personal account and assign it to some test user (customer) in your Joomla (Generated password for this account will be needed when going through checkout)
Now check the system log for more details about the payment.
Ask a question - reCAPTCHA
reCAPTCHA can be used in Ask a question form. Following parameters need to be set:
- Enable Captcha in Form (Ask Question) (Phoca Cart Options - Form - Ask Question/Feedback/Report Options)
- reCAPTCHA Site Key (Phoca Cart Options - Form - Security Options)
- reCAPTCHA Private Key (Phoca Cart Options - Form - Security Options)
Additional parameters can be set:
- reCAPTCHA Language
- reCaptcha Request Method
If reCAPTCHA is not displayed, try checking that all parameters are set (Enable Captcha in Form (Ask Question), reCAPTCHA Site Key, reCAPTCHA Private Key).
Using own SVG icons - template overrides
In Phoca Cart, in frontend, you can use icons defined in font. For example: Font Awesome library. But you can even use SVG icons. Go to Phoca Cart options and set the parameter Icon Type to SVG. Default SVG icons are defined in this file:
- media/com_phocacart/images/svg-definitions.svg
If you want to override this file, just copy it into following destination (select your active template, in this example we use default Cassiopeia template):
- media/templates/site/cassiopeia/images/com_phocacart/svg-definitions.svg
Now, you will be able to change SVG definitions and such will be not overwritten when updating Phoca Cart.
 Phoca Cart - using SVG icons