Breakfast Menu, Lunch Menu, Dinner Menu contain groups and items.
Go to Components - Phoca Restaurant Menu - Breakfast Menu (Lunch Menu, Dinner Menu). First action which should be done, is saving information in Settings. Link to Settings can be found in Toolbars.
 Phoca Restaurant Menu - Breakfast Menu, Lunch Menu, Dinner Menu - Toolbar buttons
Click on Settings icon.
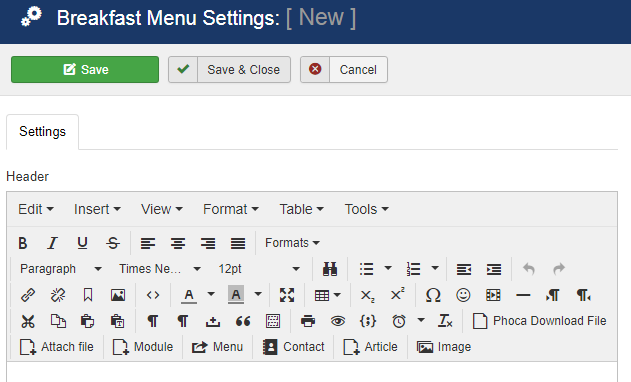 Phoca Restaurant Menu - Breakfast Menu settings
In Settings you can add:
- Header
- Footer
- Metadata Title (Metadata information in case you want to change the default value)
- Metadata Keywords (Metadata information in case you want to change the default value).
Save the Settings and go back to Breakfast Menu (Lunch Menu, Dinner Menu) - Groups. Now you can create Group. Click on New and add the following information:
- Title
- Published (Publish or unpublish)
- Message (description which is displayed below the group - after all displayed items in this group).
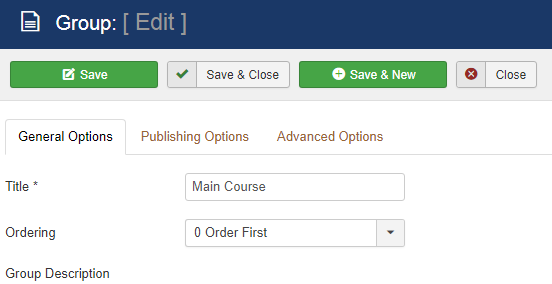 Phoca Restaurant Menu - Breakfast Menu group
Click on Save. Now the Group is created and you can create Items for this Group. Click on Items icon.
![]()
You will be redirected to list of Items. Here you can click on New and add new Item. Item contains:
- Title
- Quantity (e.g. 200 ml or 200 g)
- Price (Don't set the currency here and don't format the number, it will be formatted according to Options)
- Second Price - (Additional price column)
- Group (Select Group)
- Image ID (You can select image for this Item in case, you have installed Phoca Gallery and added images into this gallery. Image will be displayed next to the item)
- Description
- Published (Publish or unpublish)
- Order.
After successful addition of Groups, Items and information in Settings you can create menu link to this Breakfast Menu (Lunch Menu, Dinner Menu) in Joomla! menu manager. In your Joomla! administration site go to Menus - e.g. Main Menu and click on New (create new menu link). Select Phoca Restaurant Menu - Breakfast Menu (Lunch Menu, Dinner Menu).
Add Title and Alias and set Options and save this menu link. Now on your site frontend link to Breakfast Menu (Lunch Menu, Dinner Menu) will be created. After clicking this link, Breakfast Menu will be displayed.
Options (menu link):
- Icons - display icons or text (PDF, Print and Email icons)
- PDF Icon - display or hide PDF icon - Phoca PDF component and Phoca PDF Restaurant Menu plugin need to be installed to create PDF on your site
- Print Icon - display or hide Print icon
- Email Icon - display or hide Email icon
Toolbars in administration
- Back Button to Control Panel
- New - create new group
- Edit - edit current group
- Multiple Edit - edit all groups, items and groups at once
- Raw Edit - edit all groups, items and groups at once in raw text
- Email - you can mail menu of selected group to your customers (see Email in this guide)
- Preview - this is preview of the created weekly menu - this preview can be printed or screenshot of this preview can be made
- Create PDF - if you have installed Phoca PDF component and Phoca PDF Restaurant Menu plugin on your site, you can create PDF document from weekly menu
- Publish - publish groups
- Unpublish - unpublish groups
- Delete - delete groups
- Settings - set Header, Footer and Meta tag information.